
Whip Up Happy Moments with Easter Egg Cheesecake Jars
The first time I attempted to make cheesecakes in jars was a complete mess. I’d promised my son, Thomas, a special Easter dessert, his little eyes shining with mischief as he begged to get creative in the kitchen. Sounds easy enough, right? I was catching the Easter spirit, hands dusty with flour, when I realised I’d forgotten an essential ingredient. Cue the panic. There I was, looking at a half-mixed bowl of cream cheese and sugar, flour spilling onto the floor with reckless abandon, and Thomas just standing there, giggling at my kitchen disaster like a mini Gordon Ramsay in training. “Mum, maybe it’s just me, but shouldn’t we have eggs for an Easter dessert?”
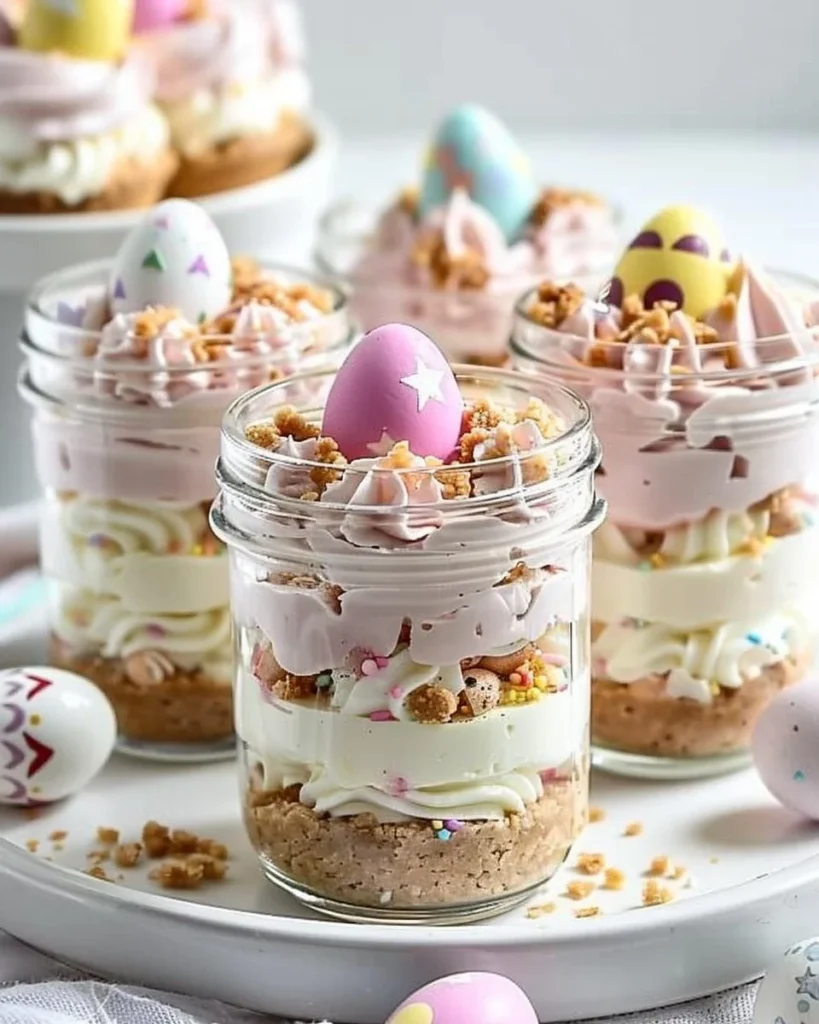
And that’s how my journey to create Easter Egg Cheesecake Jars began—not with a Pinterest-perfect plan but with a head full of chaos and a heart determined to please my son. Now, years later, whenever we sit down with our little jars filled with delicious fluffy cheesecake and Easter goodies, I can’t help but smile because those jars have become a staple at our Easter gatherings. This is the recipe that says Easter to us, filled with vibrant colours and creamy goodness, and it’s perfect for when you want to spend more time enjoying the day rather than fretting in the kitchen.
Why This Matters
Here’s the thing: Easter isn’t just about the eggs or the bunnies, it’s about creating memories with the people you love. These Easter Egg Cheesecake Jars are all about bringing joy to the table without the fuss. They say “I love you” without needing to shout it from the rooftops. When you get together, laughter, stories, and good food are what linger long after the plates are cleared. So whether you’re whipping these up for your family, for a gathering with friends, or as a surprise treat for a neighbour, just know that you’re not just making dessert. You’re crafting happiness.
Before You Start
Before diving into this colourful delight, here are some nuggets of wisdom that’ll save your sanity:
- Equipment Check: Grab your food processor. Trust me on this: it makes everything easier. If you’re missing it, a sturdy bowl and a whisk will do, but it’ll test your arm strength (I’m not saying it’s easy).
- Ingredient Swaps: If you can’t find Easter-themed chocolate eggs, don’t sweat it! Use regular chocolate or even fruit like berries. Absolutely delicious!
- Kiddo Chaos: If your toddler decides that this is the perfect time for a meltdown (speaking from experience), just cover the mix and take a breather. It’ll be waiting when you’re ready.
- Beverage Choices: Pour yourself a nice cup of tea while you’re cooking. It’s that kind of day, trust me.
Ingredients List with Personal Notes
- 2 packs of cream cheese (softened) (I usually go for Tesco’s own brand because budget, but Philadelphia makes it fluffier.)
- ¾ cup of icing sugar (If you’ve got the regular stuff, just give it a quick blitz in the blender to powder it up. No judgement here.)
- 1 tsp vanilla extract (I’ve got the fancy stuff, but honestly, the cheap version works just fine too.)
- 1 cup heavy cream (The key to making it light and luscious. Full-fat all the way, baby!)
- Graham cracker crumbs (1 ½ cups, more if you’re feeling crumbly) (Because nobody can say no to that buttery crunch, am I right?)
- 1 stick of unsalted butter, melted (It’s the glue that holds the whole jar together.)
- Mini chocolate eggs and sprinkles for decoration (Don’t skimp here; they make it festive!)

Step-by-Step Instructions
Step 1: Get Mixing
Practical Instruction: In a large bowl, whip together the softened cream cheese, icing sugar, and vanilla extract until smooth.
Human Insight: This is the base of your cheesecake. Whipping it together well will help avoid lumps, and nobody wants lumpy cheesecake. Just don’t beat it too much because we’re not making butter here.
The Anecdote: The first time I made this, I got so excited that I over-whipped it. Trust me, that was a mistake—think cheesecake that’ll bounce back at you.
Step 2: It’s Time for Cream
Practical Instruction: In another bowl, beat the heavy cream until it forms stiff peaks.
Human Insight: The right texture here is crucial. Stiff peaks mean it’ll hold shape when layered—no weird pancake texture, just lovely.
The Anecdote: I once got distracted and ended up with chunky cream. Just… no. If it happens, you can still save it by folding it gently into the cream cheese mixture—no lumps, remember?
Step 3: The Blend
Practical Instruction: Carefully fold the whipped cream into the cream cheese mixture until combined.
Human Insight: Folding is key here. You want to keep all that air in, not knock it out. It’s about gentle movements.
The Anecdote: My husband, Mark, once tried stirring aggressively and I thought we were going to have pancake cheesecake again. Now he knows that gentle wins the day.
Step 4: Crust Time!
Practical Instruction: In a medium bowl, combine the graham cracker crumbs with the melted butter. Mix until the texture resembles wet sand.
Human Insight: This is your crust. Do not skip the butter. It’s the magic ingredient that makes everything stick together.
The Anecdote: The kids love this part, mostly because they think helping means getting to snack on those crumbs. I might ahem join them, too.
Step 5: Layering
Practical Instruction: In your serving jars, start with a layer of the graham cracker mixture followed by a layer of the cream cheese mixture. Repeat until you reach the top—filling the jars about ¾ full.
Human Insight: I like to make two layers because it looks fancier and gives more of that cheesecake experience. Plus, you get to enjoy all the textures in one mouthful. If you have leftovers, just layer them in a bowl—who needs fancy jars, anyway?
The Anecdote: Last Easter, I accidentally ended up with more than I planned (let’s just say spoons were involved). The kids weren’t complaining, though; dessert for breakfast, anyone?
Step 6: Decorate
Practical Instruction: Pop on some mini chocolate eggs and sprinkles on top for the festive touch.
Human Insight: A little goes a long way here. The best part? You can use whatever candy you love. This year, M&Ms are looking tempting for added colour.
The Anecdote: The first time I decorated, I got so excited I ended up using half the chocolate stash. Honestly, the neighbours were quite impressed when I delivered jars laden with candy. Different vibes, but I wasn’t about to let those go to waste!
Troubleshooting Real Life
If your cream is just not whipping, it could be that your bowl is greasy. Well, have a look—if so, wipe it out with a paper towel until it’s nice and clean. Or if it’s simply not coming together, you can mix in some extra cream cheese along the way to help bring things together.
Out of graham crackers? Trust me, you can use digestive biscuits in a pinch. They have that same buttery goodness that just works.
Should you need to pause because the kids start a spontaneous dance party, here’s your pause button: Cover your jars, pop them in the fridge, and dive back into the fun. They’ll wait for you, don’t worry!
How to Serve
I serve these in mason jars because they add to the rustic charm and people can just grab and go, but honestly? Sometimes we eat it straight from the bowl. And who says there’s no class in that?
Honestly, they’re great cold, but if you want to indulge, let them sit out for about 10–15 minutes to soften a tad.
When I Make This
I usually roll up my sleeves for Easter Sunday because it’s our family’s mini-celebration, and it’s a great excuse for everyone to gather ‘round. While they set in the fridge, I flit about—the laundry needs sorting, and I always manage to squeeze in a call to my sister, who will definitely want to be among the first to hear about the change in plans if Thomas decided to dive headfirst into the jelly beans instead.
We usually end up dining at the coffee table, feet up, laughter tumbling over like the sprinkles on our cheesecake. And the best part? Cleanup doesn’t take long because when you’re eating out of jars, minimal dishes!
The Conversational Close
This recipe has seen me through messy holidays, last-minute gatherings, and moments when I wasn’t sure what to do next. I might not be a professional baker, but these little jars of happiness are mine, and I love sharing them.
So what’s your go-to comfort dessert? The kind that wraps you up like a warm hug? I’m always curious, so feel free to share below! I’d love to see your own version of joy in a jar!
FAQ
-
Can I make these in advance?
Absolutely! They stay fresh in the fridge for up to 3 days, making them perfect for prepping ahead of time. -
Can I freeze them?
Technically yes, but I wouldn’t recommend it. The texture might change a bit once thawed, and who wants a watery cheesecake? -
What if I want to make these adult-friendly?
You can definitely add a splash of liqueur, like Baileys or Kahlua, to the cheesecake mix for a little kick!
Now get your jars ready, channel your inner chef, and let’s fill them with joy! Happy Easter!
Easter Egg Cheesecake Jars
Ingredients
Method
- In a large bowl, whip together the softened cream cheese, icing sugar, and vanilla extract until smooth.
- In another bowl, beat the heavy cream until it forms stiff peaks.
- Carefully fold the whipped cream into the cream cheese mixture until combined.
- In a medium bowl, combine the graham cracker crumbs with the melted butter. Mix until the texture resembles wet sand.
- In your serving jars, start with a layer of the graham cracker mixture followed by a layer of the cream cheese mixture. Repeat until you reach the top—filling the jars about ¾ full.
- Pop on some mini chocolate eggs and sprinkles on top for the festive touch.