
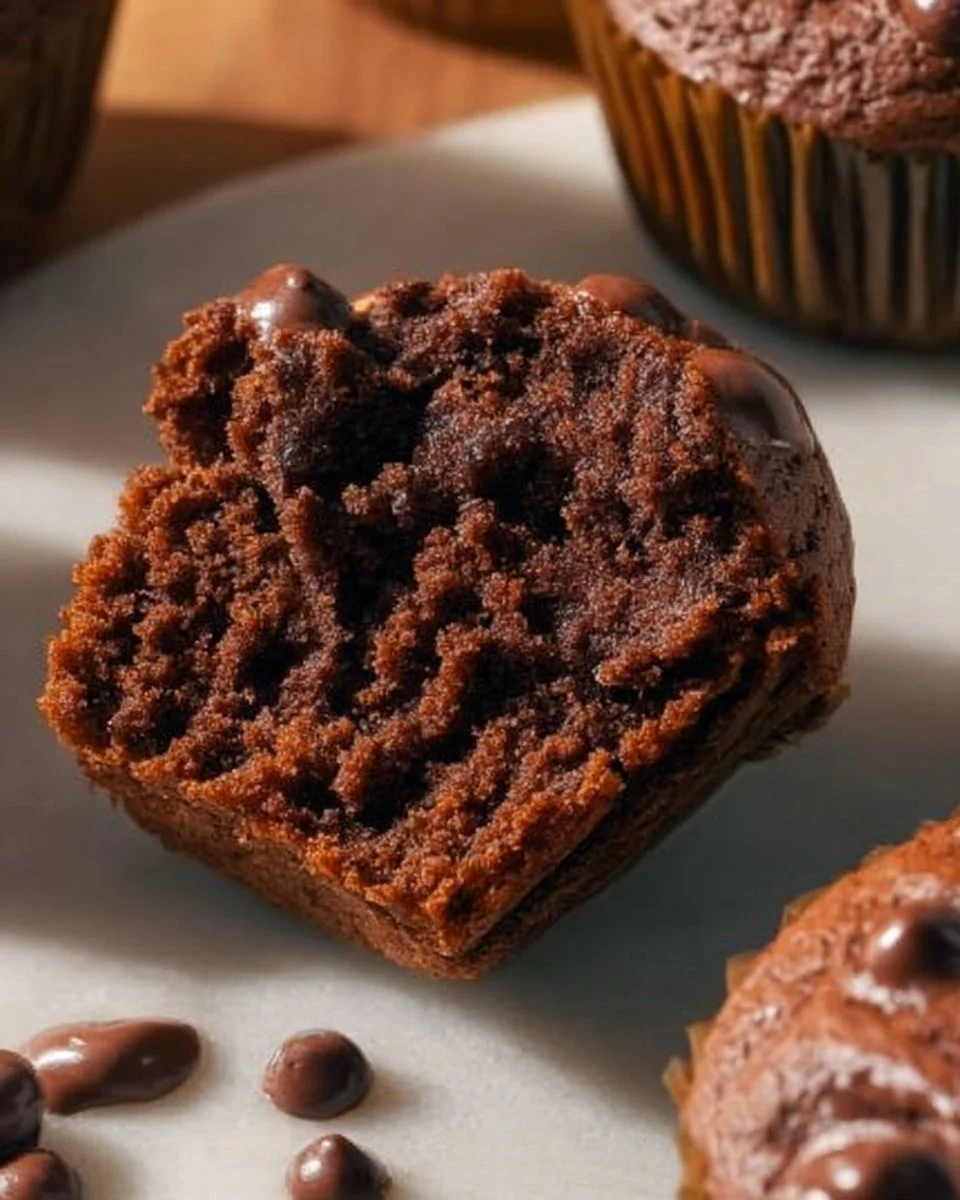
Healthy Chocolate Chip Greek Yogurt Muffins: A Deliciously Guilt-Free Treat
The first time I attempted to bake muffins, let’s just say my confidence was much higher than my skill. I was in the middle of a culinary "experiment"—a mix of flour, eggs, and more egg shells than I’d like to admit—when my daughter Sophie walked in. She took one look at the chaos and exclaimed, “Mum, is everything supposed to look like this?” My face flushed, and the only thing I could do was laugh as I pulled a half-burnt mass of dough from the oven. That was years ago, back when I thought “baking” meant throwing everything together and hoping for the best. Now, I’m telling you—after much trial and error, and a few too many pancake days—I finally cracked the code. Enter my Healthy Chocolate Chip Greek Yogurt Muffins!
Why This Matters
These muffins aren’t just any regular muffin; they’re soft, chocolaty, and can totally lift your spirits without weighing you down. Trust me, when life feels like a rollercoaster (we’re talking toddler tantrums or work deadlines), these muffins are a beacon of hope, providing that little boost of joy. They’re my go-to treat when everything else seems to be falling apart or when I need to bribe Sophie into doing her homework (seriously, chocolate is my parenting ally). You’ll find that they are also ideal for breakfast, snacks, or even dessert—without the guilt factor! So grab your apron (or don’t, I usually don’t), and let’s get baking!
Before You Start
- If you don’t have Greek yogurt, no worries! You can use regular yogurt. Just remember it might alter the texture a wee bit, but it’ll still taste amazing.
- Keep your kitchen scales handy. Trust me, weighing your ingredients is a game changer for making sure things turn out right.
- Got a toddler who decides to help? (Raise your hand if that’s you!) Prepare some extra chocolate chips to keep them busy while you work. They love ‘helping’ with sprinkles!
- Pour yourself a cup of tea (or coffee). This is not just a recipe; it’s a little therapy session with your favourite beverage.
Ingredients
- 1 ½ cups whole wheat flour (you can swap with all-purpose, but I love the heartiness of whole wheat)
- ½ cup rolled oats (they add a lovely texture—don’t skip them!)
- ½ cup coconut sugar (experimented with brown sugar, but this gives a delightful caramel hint)
- 1 tsp baking powder (my secret—ensures a nice lift)
- ½ tsp baking soda (this is the part that adds magic fluffiness)
- ¼ tsp salt (never forget the salt; it enhances flavour)
- 1 cup Greek yogurt (I tend to reach for Fage, it’s creamy and rich)
- 2 large eggs (our family farm-eggs come in handy here)
- ½ cup unsweetened applesauce (who knew this little jar of goodness would save so many calories?)
- ½ tsp vanilla extract (just a splash for that comforting aroma)
- ½ cup dark chocolate chips (because chocolate!)
- Optional: a handful of nuts or seeds (for added crunch—I usually sneak them in if Sophie isn’t looking)
Step-by-Step Instructions
Step 1: Preheat That Oven!
Practical Instruction: Preheat your oven to 350°F (175°C) and grease a muffin tin or line it with paper liners.
Why this matters: A good preheat helps ensure those muffins rise well and cook evenly.
Anecdote: I’ve forgotten to preheat before, and trust me, it’s not pretty. The muffins turned out flat and sad, and I may have shed a tear (or five) in the process.
Step 2: Mix the Dry Ingredients
Practical Instruction: In a bowl, combine the flour, oats, coconut sugar, baking powder, baking soda, and salt.
Common mistake here: People often skip whisking dry ingredients together. Don’t—this ensures even distribution of the leavening agents!
My hack: I make extra and store it in a jar for my next muffin adventure. Easy-peasy.
Sensory cue: You’ll know it’s ready when you can smell the nutty aroma of the oats.
Step 3: Combine the Wet Ingredients
Practical Instruction: In another bowl, whisk together Greek yogurt, eggs, applesauce, and vanilla.
Why this step matters: Whisking well ensures no lumps in the mixture.
Anecdote: The time I tried to rush this, I ended up with a funky egg clump in my batter. I’ll let you decide how my family reacted.
Step 4: Mix It Up!
Practical Instruction: Gradually fold the wet ingredients into the dry until just combined (don’t overmix—you want those muffins fluffy, not rubbery).
My personal hack: If you can still see some flour, it’s okay. Muffins are forgiving like that.
Sensory cue: It should look a bit lumpy, but not dry.
Step 5: Add the Chocolate Chips
Practical Instruction: Gently fold in the chocolate chips. If you’re adding nuts or seeds, throw them in too!
Why this step matters: Distributing them around will prevent them from sinking to the bottom while baking.
Anecdote: Sophie always fights me for the bowl to lick the spoon clean (and let’s be real; I sometimes let her… but only sometimes).
Step 6: Spoon and Bake
Practical Instruction: Evenly distribute the batter into the muffin tin, filling each cup about ¾ full.
Common mistake here: Overfilling. Pay attention to how high you fill them; they don’t need to explode in the oven.
Sensory cue: You’ll know it’s baking time when you see the batter just below the rim.
Step 7: Bake to Perfection
Practical Instruction: Pop those muffins into the oven and bake for 18-20 minutes or until golden brown.
If you’re multitasking: This is the perfect time to fold that laundry you’ve been avoiding.
My secret tip: I usually set a timer but get lost in a podcast, so I might overbake. Stressbaking?
Step 8: Cool and Serve
Practical Instruction: Allow muffins to cool in the tin for 5 minutes before transferring them to a wire rack.
How to serve it: Pop them into a cute basket and set them on the table while you sip your favourite drink. They’re fantastic warm with a bit of butter, but honestly, they can be munched straight away!
Troubleshooting Real Life
- If you burn the bottom: Don’t panic! Cut off the burnt edges, let them cool, serve with a smile (or ice cream).
- If you’re out of Greek yogurt: Plain regular yoghurt works, but if you happen to have some sour cream, you can use that too for extra richness.
- If things just aren’t working: It’s okay to savour the moment, pour yourself a generous cup of tea, and order take-out without guilt.
The Serving Story
I tend to serve these muffins in a cheerful basket that I found at a thrift store. Honestly? I’m convinced presentation makes everything taste better. We often gather around the dining table on a lazy Sunday morning, paired with some fresh fruit. Leftovers get popped in plastic wrap for quick breakfasts or snacks during the week—they taste even better the next day (the chocolate just melts a bit more, if I’m honest).
When I Make This
I usually whip these up on a Saturday morning while the sunlight filters through the kitchen window. I often have a few classic 80s tunes playing on my phone (for a little dance-off while stirring). We usually enjoy them still warm at the dining table, which is piled high with all sorts of weekend chaos—homework, laundry, and maybe half-finished puzzles. The clean-up? It takes about 10 minutes, but each minute is worth it for those happy faces in my family.
The Conversational Close
This recipe has seen me through countless breakfasts, school bake sales, and the occasional midnight snack (shhh!). It might not be perfect, but it’s mine, and that’s what makes it special. If you end up making these muffins, I’d love to hear how they turn out. Tag me on social media or share your little stories—your kitchen adventures are always inspiring! So, what’s your go-to treat when life gives you lemons? Mine, for now, is these marvelous muffins that double as a hug in a baking cup!

FAQ
Can I freeze these muffins?
Absolutely! Just pop them in a freezer bag after they’ve cooled completely. They freeze beautifully, and you can reheat them in the microwave for a warm treat anytime you fancy.
What’s the best way to store them?
Keep them in an airtight container at room temperature for about 3-4 days. If they last that long!
If you’ve got any more questions or need personal tips, don’t hesitate to ask! Happy baking!

Healthy Chocolate Chip Greek Yogurt Muffins
Ingredients
Method
- Preheat your oven to 350°F (175°C) and grease a muffin tin or line it with paper liners.
- In a bowl, combine the flour, oats, coconut sugar, baking powder, baking soda, and salt.
- In another bowl, whisk together Greek yogurt, eggs, applesauce, and vanilla.
- Gradually fold the wet ingredients into the dry until just combined.
- Gently fold in the chocolate chips and any nuts or seeds if using.
- Evenly distribute the batter into the muffin tin, filling each cup about ¾ full.
- Bake the muffins for 18-20 minutes or until golden brown.
- Allow muffins to cool in the tin for 5 minutes before transferring to a wire rack.