
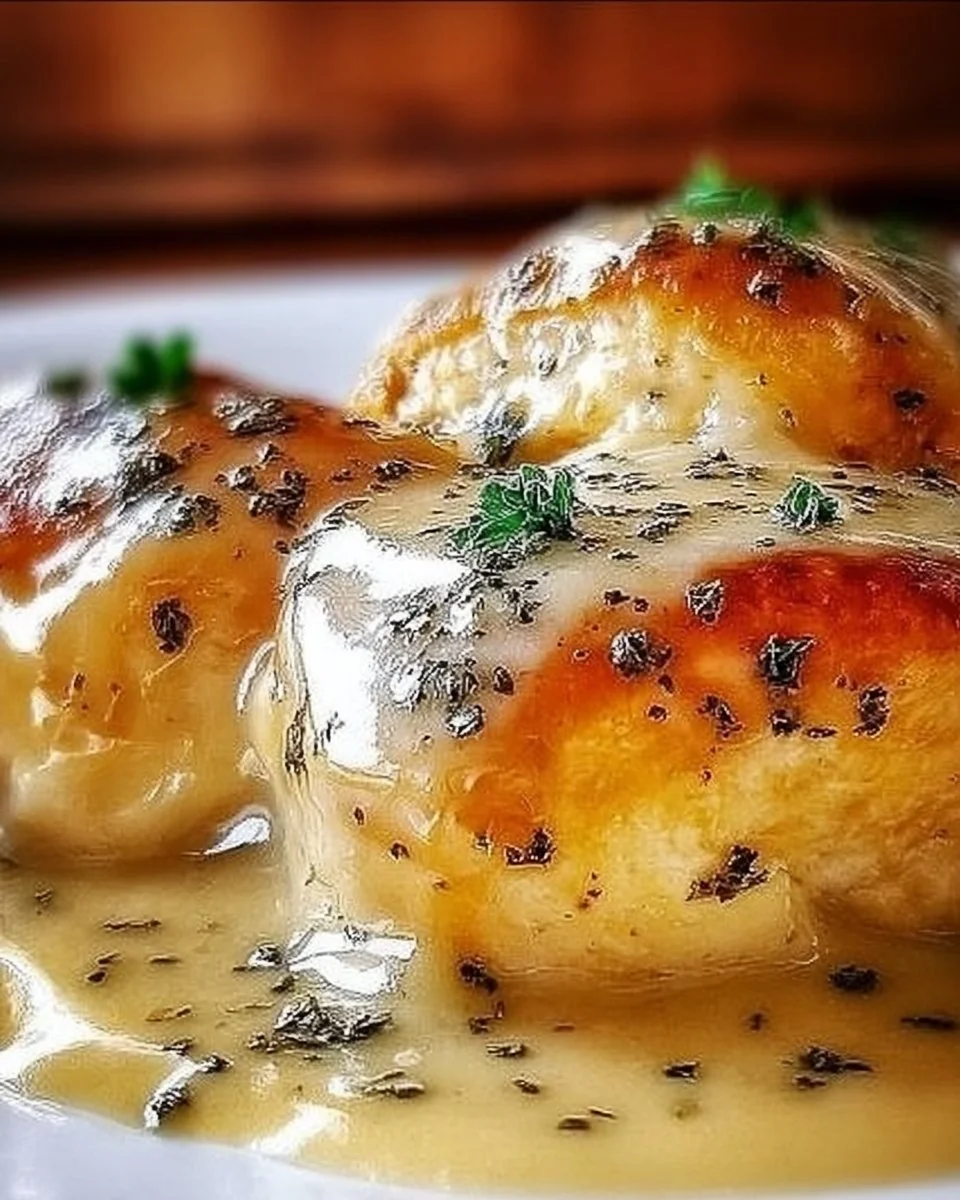
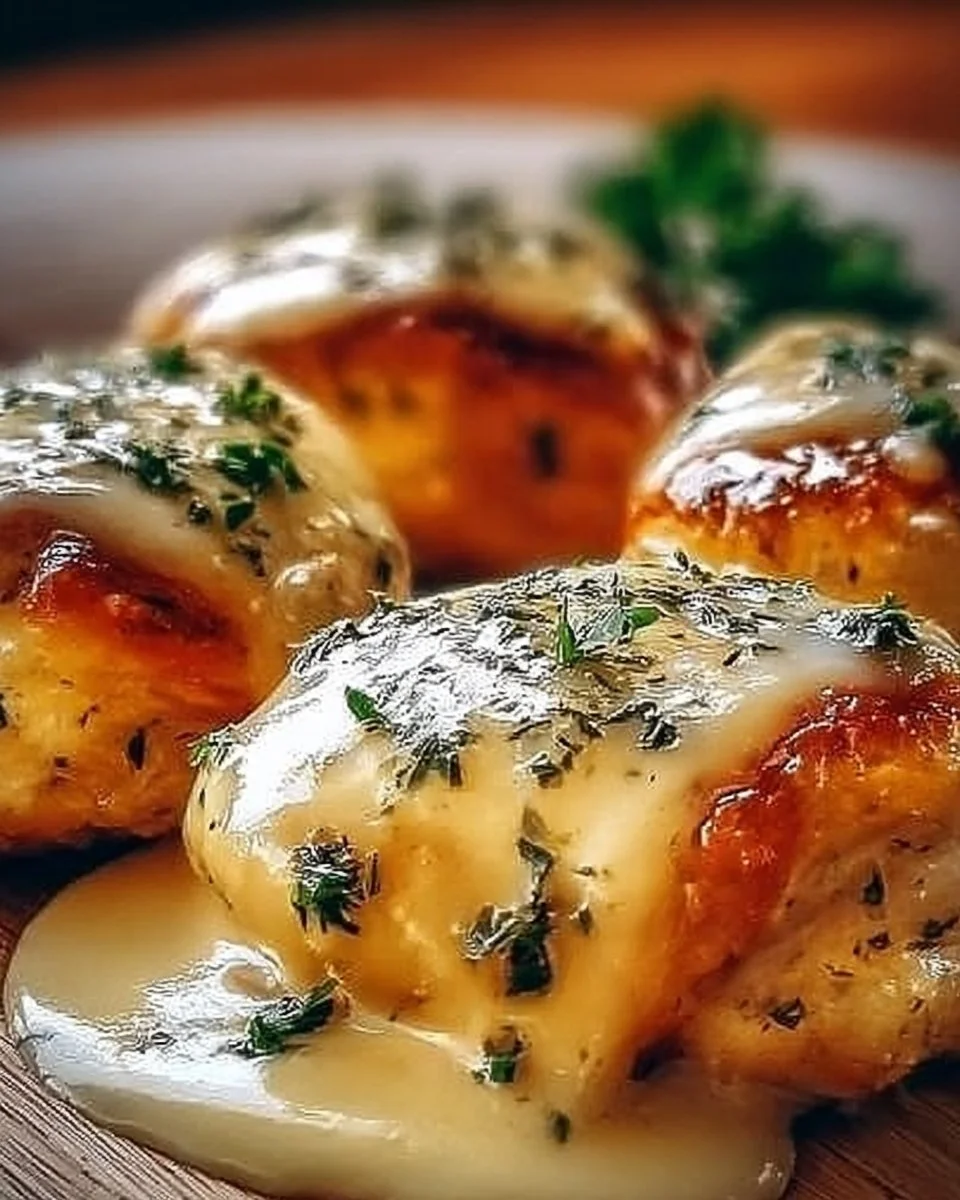
Indulge in Decadence: My Journey to Perfect Chicken Pillows
The first time I tackled making Chicken Pillows, I was so convinced I could pull it off that I didn’t even bother reading the recipe in full. (Because who has time for that, right?) Picture this: fluffy pastry filled with creamy, dreamy chicken filling, hot out of the oven, and a perfect golden crust. What could possibly go wrong? Well, let me tell you. I ended up with a doughy disaster that looked more like sad little lumps than the fluffy pillows I envisioned. My husband, Mark, walked in just as I was mopping up the mess, and he said, "Honey, if at first you don’t succeed, try again—just don’t forget the chicken next time." I laughed (not that gracefully), but it struck a chord, and I knew I had to perfect it. That was five years ago, and now I whip these divine Chicken Pillows up whenever I need a comforting dish that connects me to my family.
Okay, let’s be real. These aren’t just any chicken pillows. They’re what I make when I need a hug in food form—when the world feels a bit heavy, or when the weather’s dark and dreary, (like those rainy autumn days we get here in the UK). They say “I love you” better than the most eloquent of letters, and every bite feels like a cozy embrace.
You might be thinking, “Can I really pull this off?” Trust me, you can! With the right guidance (and perhaps a glass of wine—I’m telling you, it helps), you’ll be making these Chicken Pillows like a pro. So grab your apron, and let’s transform some basic ingredients into a dish worthy of Sunday dinners—or every day really because life is too short for boring meals!
Why This Matters
These Chicken Pillows are so much more than just dinner; they are a remedy for all the chaotic moments we face. This is the meal you turn to when your to-do list is a mile long but you still want to sit down with your family over something special. It’s an instant pick-me-up when you’ve had one of those “everything that can go wrong, has gone wrong” kind of days. Plus, they impress everyone from the in-laws to your picky eaters—all without spending your entire paycheck; it’s comfort food that doesn’t break the bank!
Before You Start
- If you don’t have puff pastry, you can use shortcrust instead, although it won’t have that wonderfully flaky texture. (Still delicious, though!)
- The one tool that makes this infinitely easier? A good rolling pin—trust me, your arms will thank you.
- What to do if your toddler starts melting down at step 3 (which, full disclosure, happens to me frequently): Have a bowl of pre-chopped vegetables or snack foods on hand to distract them while you roll out your dough.
- And remember, what’s the one wine to pour while cooking this? A crisp, chilled Pinot Grigio—it pairs beautifully with the dish and adds a little zest to your evening!
The Ingredients
- 500g chicken breast, cooked and shredded (I use leftover roast chicken from Sunday dinner—double win!)
- 300g cream cheese (You can use a low-fat version if you prefer, but trust me, go for the full-fat for ultimate creaminess.)
- 1 cup grated cheese (I usually go for cheddar because, let’s be real, it’s always in the fridge waiting to save the day.)
- 2 tbsp fresh chives, chopped (A staple in my house—Mark loves them! But feel free to skip if you’re not a fan.)
- 1 packet of puff pastry (I love using Jus-Rol; they never let me down!)
- 1 egg, beaten (This is what gives your pillows that beautiful golden finish.)
- Salt & pepper to taste (Always use freshly cracked pepper if you can; it elevates everything.)
- Optional: garlic powder or onion powder (I don’t usually add them, but sometimes a little extra flavour is all you need.)
Step-by-Step Instructions
Step 1: Prepare the Filling
Practical Instruction: In a bowl, combine the shredded chicken, cream cheese, grated cheese, and chives. Mix well, and season with salt and pepper.
Human Insight: Why this step matters: Mixing your filling well ensures every pillow has a bit of everything in it and keeps them from falling flat (literally!).
Anecdote: I remember my first attempt at this step; I was so excited I forgot to season! You can only imagine how that turned out. Now, I have a notes app on my phone to remind me about flavour!
Step 2: Roll Out the Pastry
Practical Instruction: On a floured surface, roll out the puff pastry until it’s about 5mm thick.
Human Insight: Common mistake here: Many people rush this step and roll out the pastry too thin—it makes it hard to hold the filling!
My personal hack: I keep mine between two sheets of parchment paper to prevent sticking and to save on flour dusting.
Step 3: Cut and Fill
Practical Instruction: Cut the pastry into squares, about 10cm by 10cm, and place a spoonful of filling in the centre of each square.
Human Insight: The sensory cue: You’ll know you’ve cut enough when you’ve got a lovely little assembly line going!
Anecdote: This is where my daughter, Lily, always wants to help. I keep a small bowl of ingredients just for her to ‘cook’ with while I do the real work. It brings a smile to my face every time she proudly shows off her ‘creation’ while I realign my perfectly filled pillows!
Step 4: Fold and Seal
Practical Instruction: Fold each square over to form a triangle, pressing the edges firmly to seal. You can use a fork to crimp the edges if you fancy a little decorative touch.
Human Insight: My personal hack: Brush the edges with a little water to help seal them better—nobody wants a filling explosion in the oven!
Step 5: Brush and Bake
Practical Instruction: Place the pillows on a baking tray lined with parchment paper. Brush the tops with the beaten egg for that gorgeous golden hue.
Human Insight: You’ll know it’s ready for the oven when they glisten invitingly.
Anecdote: I used to rush this step until I burnt the bottoms three Tuesdays in a row (you’d think I’d learn, right?). Now, I always set a timer for close monitoring!
Troubleshooting Real Life
- If you burn the bottom: Lower the oven temperature slightly next time, but you can salvage it by slicing off the burnt bits neatly before serving.
- If you’re out of chives: No worries! Green onions or even parsley can step in just fine—be creative!
- If you need to pause because kids need dinner: Roll out the pastries, fill them, cover them, and pop them in the fridge! They can sit there until you’re ready to bake (just make sure to add a bit more time to the baking).
The Serving Story
I serve these delicious Chicken Pillows in my favourite oven-safe dish—there’s just something special about the way they look nestled quietly together. So yes, presentation matters! You know what? Sometimes we enjoy them straight from the dish while huddling on the couch for a movie night.
Oh, and leftovers? They taste even better because the flavours have time to marry overnight, so don’t worry if you make too much; it’s considered a treat!
When I Make This
Typically, I whip these Chicken Pillows up on a Wednesday night when life seems extra busy (because yes, my week has already felt like a marathon by then). While they cook, I often fold laundry—making dinner always feels better when I’m multitasking, after all. We usually eat them at our kitchen table, surrounded by the clutter of our busy lives. Cleanup takes about 20 minutes, but it’s worth every second spent because the joy they bring to my family’s faces is everything.
Conversational Close
This recipe has seen me through family gatherings, home-cooked date nights with Mark, and even solo binge-watching sessions when I just needed something comforting. I’m not gonna lie: they might not be flawless, but they’re filled with love—and that’s what makes them perfect for me. I’d love to hear if you make them—tag me on social, or just enjoy the quiet moment in your kitchen.
So, what’s your go-to comfort food? Mine has changed over the years, but right now, it’s these decadent Chicken Pillows every single time. They remind me that, no matter how chaotic life gets, a little culinary magic can transform an ordinary day into something special.
FAQ
-
Can I freeze Chicken Pillows?
Yes! Just ensure they’re fully cooled before wrapping them well in cling film to preserve freshness. You can bake them straight from frozen; just add a few extra minutes to the cooking time! -
What can I serve with Chicken Pillows?
A simple green salad with a zingy vinaigrette pairs beautifully. And honestly, I also enjoy them with a dollop of ketchup on the side, but that might just be me! -
How do I know if my Chicken Pillows are done?
The tops should be golden brown and have a lovely earthy aroma. Also, gently press the sides—if they feel firm and not gooey, they’re ready! -
Can I use store-bought rotisserie chicken?
Absolutely! In fact, it cuts down your prep time significantly, and it’s usually super flavourful. -
How can I spice these up?
Feel free to add a dash of cayenne pepper or some finely chopped jalapeños to the filling for a fiery twist!
So, there you have it! Join me next time as we explore another cozy dish that holds a special place in my heart. Until then, remember: the kitchen is where love begins. Happy cooking!

Chicken Pillows
Ingredients
Method
- In a bowl, combine the shredded chicken, cream cheese, grated cheese, and chives. Mix well, and season with salt and pepper.
- On a floured surface, roll out the puff pastry until it's about 5mm thick.
- Cut the pastry into squares, about 10cm by 10cm, and place a spoonful of filling in the centre of each square.
- Fold each square over to form a triangle, pressing the edges firmly to seal. You can use a fork to crimp the edges for a decorative touch.
- Place the pillows on a baking tray lined with parchment paper. Brush the tops with the beaten egg.
- Bake in the preheated oven until golden brown and cooked through.